Tuesday, 31 August 2010

60 little boxes

Burnice has been a busy bee these last few weeks.   
A work colleague was looking on a website for little favour boxes and commented on how expensive they were.   Burn butted in with "make them yourself Alisa - it's easy!"
After a few "how do I do that" and "where do I get the stuff from" Burn had talked herself into making them!!!
Fortunately for Burn she had seen some not two days before made by the wonderful Clair at Valentines.   Great idea she (Burn that is not Clair) thinks.   Just one great big gynormous humungous problem.  Burn doesn't have a big shot let alone the die.    She emails the wonderful Clair, grovels slightly and borrows said big shot and die.   I got to keep it for a whole week................
Alisa's mum loves freshias (so what I hear you cry!).  Alisa is doing a surprise 75th birthday party for her mum and that's what the boxes are for.  
Now for the next problem - I don't have enough coloured card but I do have tons of white card so I cut them all out of that.  When I stuck the patterned card on it looked awful.   Now this is the point where I thunked "should have used coloured card!".   Guess what I went and done......  I got out my distress inks and coloured all the white card.    It took forever and I got very very inky fingers!   A little tip for any other plonkers out there like me - use a stencil brush and not the blending tool - it's bloomin' quicker and doesn't use so much ink!!!!   
The paper used was from the "Pocket of Posies" 12x12 pad.

I layered the inside with some tissue which will be folded over when Alisa fills them with choccies.

Drum roll and VOILA ......
60 BOXES LATER.
Must apologise for the quality of the pics.
The top right is Burn's favourite
The bottom right is a special one for Alisa's mum.

I have to say Burn thoroughly enjoyed herself making them.   Some have wooden butterflies on the front, some have sticky on butterflies and some have punched flowers with a tiny flower centre and a gem - in fact kinda wish they were all done using the punched and embossed flower.  But hey too late now!

Oh, and by the way, guess what I bought.........................


Had to be done didn't it.   It was Ron's idea - no honest it was.    I had been saving 20p pieces for ages.  In fact they were initially saved to spend at the Ardingly Quilt Show.   Forgot to count them up and pay in to my bank.   Then I thought that's fine I'll use them to go to the Sandown Quilt Festival - yep you got it, forgot again.   So they were sitting there in their bag and we sat and counted them one Sunday evening and I had £97 odd.   Cool eh!   So I went and bought one with the extender plates etc etc and an embossing folder kit thingy - the lot came to £102.  

Right that's enough from me now.

Thanks for stopping by.

Burnice xx

Wednesday, 25 August 2010

Ava's word book

Ava's Book.   Ava is Milla's mummy's cousin's new baby.  Ava Rose is her name and she is being christened this weekend in Blackburn so Milla and I set about making her this book.   

 This is the first page.    I haven't put on the reverse pages because for some reason they came out blurred!!   Thanks to Tasha for the die cut swirl...

This is the "V".   I had to put the butterfly on the other side to steady up the arm of the V.  It was a bit wobbly.  The butterflies are from a necklace I bought yesterday from superdrug and pulled it apart!!!  Die cut Tim's flowers from Tash again.

This is the last "A" .

A close up of the front page.


The finished article !   I think they make fab christening pressies.    In fact I am doing one for a little boy - will show that when it's done!

Materials used:  
Zutter's corrugated cardbord
Kaiser paints - pink and white
glaze paint - pink
viva precious metal paint - silver red
the heart and die cut flowers were covered with Terra, heat gunned and then glazed. also rubbed silver red VPM paint on them.
The gems and pearls are all from my Sarah's Cards kits
The stamp is Crafty Secrets - Journeling
The ribbons and fibres and from my stash.
In amongst the ribbons there is a tiny baby's bottle and bib bought from the Button Lady (I think!)

Right I think that's it, I think, cos I am struggling with this new blogger thing.  Just when I was getting used to the other one!!!!!!
Thanks for stopping by
Burnice x
I would just like to add that this is not all my idea!   I took my inspiration (okay I lifted it!) from the wonderful Linda Elbourne.   AKA T!ms's stalker!!!!!!  

Tuesday, 17 August 2010

Ron's Birthday BBQ

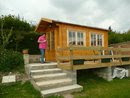
We had a BBQ on Saturday for Ron's birthday.    It rained.     The sun shone.  When it rained it bloody well rained and when the sun shot it was bloody hot !!!!  Still, undetered we sat out in the garden in the marquee which we put up "just in case it rained"!!!!!!    We had a laugh though which is all that mattered really.   Milla was a star - she was a waitress, drinks person, tea/coffee maker (we had a 10 ltr urn in the kitchen to save boiling kettles all day!) cabin tour guide and photographer.  She did very well but unfortunately failed in the photography stakes on the day.  Never mind - she did have a lot to do!!!!!!

Here are the invites I sent out.   I coloured "Ron" in all different combinations with my copics.  
The  night before Milla and I made some Garden Cup Cakes for Ron.    We decided to do these rather than have a cake for him.   The recipe is from a book Milla bought in The Works.  It's a cool cake cook book.  Am going to invest in one myself.
The first pic is of Milla with my new colourful sillicone cupcake cases.  Aren't they fab colours.  The next one is the mix.  It was supposed to be green (for the garden!) but it wouldn't go green.  Then a pic of them baked with the decorations and the last one is with the sillicone cases with "Happy Birthday" candles in them.

A grand time was had by all.

Thanks for stopping by.

Burnice x

Friday, 30 July 2010

Look wot I got today!

This is a pressie from my mate Sam. You will see on her blog how she produced this wonderful masterpiece.

This is a close up of the bottom bit.
This is a close up of the acetate bit. There are bits of gold leaf behind the acetate me thinks !!!

Isn't it just fabulous. Made my day when it arrived this morning.
All I did was leave a message on her blog saying how it would look great in my cabin !!!!!! And believe me it does !
Thanks a bunch Sam.
Thanks for stopping by.
Burn x

Tuesday, 20 July 2010

Happy Birthday Katie.....

Hope she doesn't read this !!!!

I painted a 12x10 canvas with terracotta acrylic paint. The pattern is a stencil (which I found whilst rummaging!) and painted with viva precious metal copper paint.
Then I went to town (not literally!). I made a mini version of my artsy craft weekend project. I used some metal which was cuttle bugged. The middle one on the bottom row is sticky backed metal placed over die cut letters, a butterfly and a flower. The other three tiles were done with viva terra. I can't remember the colours used!!!! I did write it all down but lost the bit of paper.......
I think I may do myself one with silver metal! As you can tell Burn likes doing these!!!!!
Actually, doing this post has just reminded me - I must phone Katie and make an appointment to have my hair cut !!
Thanks for stopping by.
Burnice x

Monday, 19 July 2010

It's only me!!!!

Hello peeps. I have been told off by three/four peeps for not blogging. Well here I am. I have been a busy bee.

First of all I made a little canvas thingy for a friend at my sign language class. Here is the metal rose. I just lurve this rose. I can't stop making them !!!! This one was done with silver metal and royal purple stazon ink.
I also did a bird cage. I like making this too. Again it's royal purple stazon with mother of pearl viva precious metal paint, kaiser antique white and dusky pink paint (all this done on the reverse)
Here is the finish article. The canvas was painted with dusky rose paint and stamped with a paperartsy swirl (loving this stamp at the moment) with stazon (royal purple). The middle is a piece of grey board covered with communal garden tin foil, glued on to the grey board and then put through the cuttlebug and dabbed with various colours of stazon - a la Sue Roddis. The edge of the canvas has viva precious metal paint in silver red and blackberry.
There yer go !
As I said I have been creating like a looney just lately so tomorrow I will post another project!
thanks for stopping by.
Love Burnice x


Wednesday, 23 June 2010

Look wot we made today!

It started off like this - we put about 35 of them into a large bowl with 50gms of citric acid, 2lb sugar, 6 lemons (cut into quarters) and 3 pints of boiling water.

We left it for 24 hours and it looked like this. Not pretty eh! We strained this through a jay cloth (I know - didn't have a muslin cloth!) and got this.............
It tastes delish - I am sooooooooooo pleased. I have put it into two water bottles so don't panic peeps, I shan't be drinking it from this bowl with a straw!!!!!
Thanks for stopping by
Burn x


Tuesday, 22 June 2010

Metal on canvas

Linda came round last night for her monthly fix in my cabin. She brought with her some metal having been inspired by Carol Cann at the Craft Barn's Extravaganza weekend.

So off we went: I had some small canvas panels which we painted. I did mine red (not surprised there are you!) and Linda did hers in a gorgeous teal colour. Then we swirled the edges with a paperartsy swirl. I stamped mine in black cherry stazon and Linda used adirondack stream. We then got some nesti/spellbinder flowers and laid them on to the canvas. Then peeled back some sticky back metal and laid it on top. Burnished to our hearts content and were very impressed with the way the texture of the canvas came through - well it would really wouldn't it as we were pressing down hard!!!!! The tools then came out and away we went. Paint was then smeared over the top and wiped off so it was left in the grooves. I finished mine off with silver red precious metal paint around the edge. Linda used blue lagoon. Here is mine:

It needs a title but haven't done that yet. Think I will stamp some words onto the metal and then place it on the canvas somewhere. Perhaps Linda will blog hers so you can see it.

This is very "clean looking" for me but I am pleased with it.

Oh and all this was done to Paulo Nutini!!!!!!!!

Thanks for stopping by.

Burn x

Thursday, 17 June 2010

P.S to yesterday's post !

I had a comment from Janet on my challenge piece.

"The bits of "stone" are actually paua shell fragments. The bird is a pukeko. The shrink plastic is a maori design".

There, see, told you !!!!!!!!!!!!!!!!!!!!!

Burn x

Wednesday, 16 June 2010

How I done it !

I should have told you peeps how I did my NZ challenge. Sorry folks, so if you want to know, read on, if not go make a cuppa!
The base is a tag from my paperartsy weekend. I painted it with broken china crackle paint and stamped a paperartsy swirl around the edge. I then stamped the little bird on it. The little bird is stamped all over the back.
The "flower" was made from the serviette. It was three ply so I took two off (just for strength at this stage) and stamped the new paperartsy flower stamp. Three big ones and one little one. I then cut them out, sprayed them with some champagne crafty notions. Dried them off and then scrunched them all up! Then I glued them on slightly off centre so it looks a bit fuller. I then glued the shrink plastic piece in the middle. I then peeled another layer of the napkin so it was just one ply thick!

The wildflower stamp is also from the same paperartsy range. The bird in the flower pot was one of the die cuts which I then glued to the marble paper and cut it out. I then glued the little "stones" on it. The bird table die cut was covered with one ply of the tissue put it through the cuttlebug with the swiss dots folder and rubbed some gold viva precious metal paint on it.

The saying is from a Tim Holtz set. I then rubbed gold precious metal paint around the edge.

Hope that clears it all up and I promise I won't let it happen again!!!!!

Thanks for popping by.

Burn x